Quick Overview:
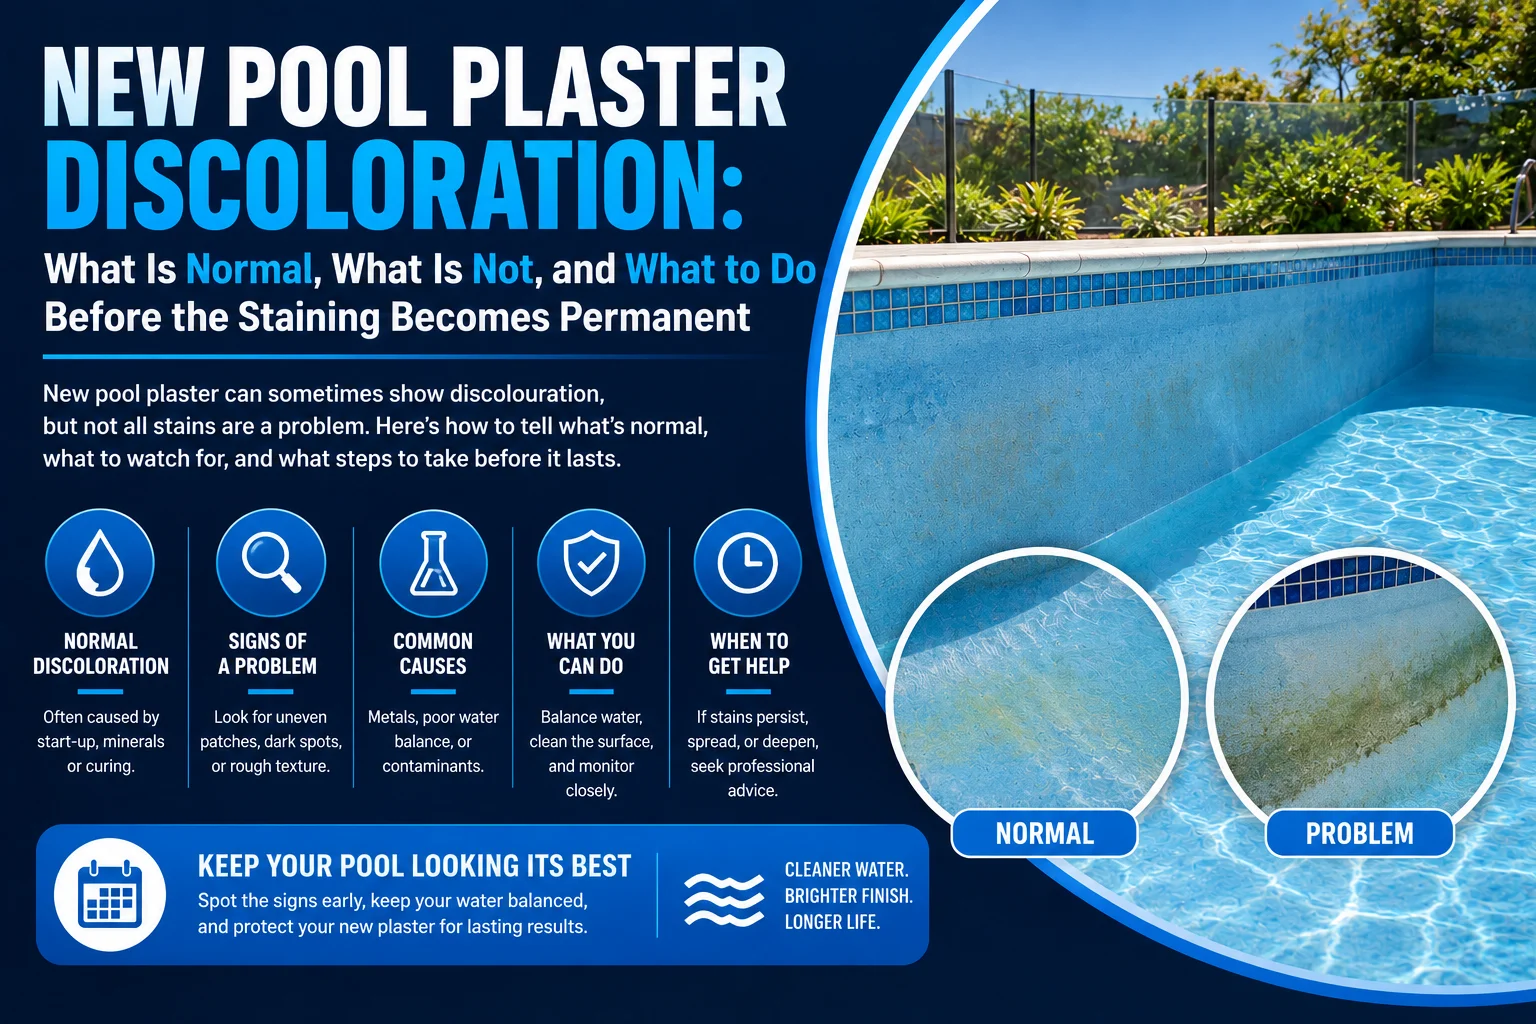
New pool plaster discoloration can appear as blotchy grey or white patches, streaks, spots, or an overall colour shift that does not match what the finished surface was supposed to look like. Some of this is completely normal: fresh plaster and pebblecrete surfaces go through a curing and hydration process during the first 28 days after filling that temporarily affects the colour and appearance. Trowel marks, shade variations between batches, and minor mottling typically even out as the surface hydrates and the water chemistry stabilises. Other discoloration is not normal and indicates a problem: metal staining from fill water (iron, copper, manganese), calcium scaling from aggressive or unbalanced water, etching from acidic water dissolving the plaster surface, organic staining from algae establishing on a new surface before the sanitiser reaches effective levels, and plaster defects from improper mixing, application, or curing conditions. Identifying which type of discoloration you have determines whether the fix is simply waiting, adjusting your water chemistry, treating the stain, or seeking warranty remediation from your pool builder.
At Advance Pool Painting, post-resurfacing support is part of every project because the first 28 days after filling determine how the surface will look and perform for years.
What Is Normal on New Pool Plaster
Fresh plaster and pebblecrete surfaces are not fully cured when the pool is filled. The surface continues hydrating and hardening for approximately 28 days after water contact. During this period, several visual changes are normal and expected.
Mottling (uneven colour patches). New plaster commonly shows blotchy, cloud-like colour variations across the surface during the first few weeks. This is caused by differences in trowel pressure during application, slight variations in the plaster mix consistency, and uneven hydration rates across different areas of the pool. In most cases, mottling evens out as the surface fully cures and the water chemistry stabilises.
Trowel marks and streaks. Visible lines or streaks following the direction the plaster was trowelled are common on freshly applied surfaces. These are more visible when the pool is empty or when the water is very clear with strong overhead light. Most trowel marks become less visible as the surface hydrates and develops a uniform patina.
Initial colour shift from the dry sample. The colour of cured, submerged plaster will always differ from the dry colour chip you chose. Water depth, lighting conditions, and the natural darkening that occurs during curing all shift the final colour. A surface that looks lighter or slightly different from the showroom sample immediately after filling is normal and will continue shifting toward its final colour over the first month.
Dust or chalky residue. New plaster releases calcium hydroxide (plaster dust) into the water during the initial curing period. This is normal and is managed through the startup chemistry process. The dust settles on the surface and is brushed off during the daily brushing that is part of the standard resurfacing maintenance program.
“The most common call we get in the first two weeks after filling is ‘something is wrong with my plaster.’ In about half of those cases, what they are seeing is normal curing behaviour that resolves within the first month. The other half is a water chemistry issue that, if caught early, is completely fixable. That is why the startup chemistry process is so important.”
What Is Not Normal: Discoloration That Indicates a Problem
These types of discoloration are not part of the normal curing process and indicate a specific issue that needs addressing.
| Discoloration Type | What It Looks Like | Most Likely Cause | How Urgent |
|---|---|---|---|
| Brown, red, or rust-coloured spots or staining | Localised brown or reddish spots, may spread across the surface over days | Iron in the fill water or source water reacting with the alkaline plaster surface | Act within days. Iron staining becomes permanent if left untreated. |
| Blue-green or teal staining | Blue-green patches or an overall teal tint, particularly on lighter plaster | Copper in the water from copper-based algaecides, copper heat exchangers, or copper plumbing | Act within days. Copper staining embeds deeper with time. |
| Black or dark purple spots | Dark spots, often concentrated near fittings or in areas of low circulation | Manganese in the fill water. Less common than iron but more visually dramatic. | Act within days. Manganese staining is difficult to remove once set. |
| White chalky deposits or scaling on the surface | White, rough, crusty deposits on the plaster surface, particularly at the waterline | Calcium scale from high calcium hardness, high pH, or high total alkalinity in the water | Act within weeks. Scale bonds to the surface and becomes harder to remove over time. |
| Rough, etched, or dissolved-looking surface | Surface feels rough or sandy rather than smooth, colour appears washed out or lighter than expected | Aggressive water (low pH, low alkalinity, low calcium hardness) dissolving the plaster surface | Act immediately. Etching is irreversible surface damage, not a stain. |
| Green film or patches | Green coating developing on walls or floor, particularly in corners and shaded areas | Algae growth from insufficient sanitiser levels during the startup period | Act immediately. Algae establishes quickly on new, unsanitised surfaces. |
| Severe, widespread, persistent mottling after 28+ days | Dramatic colour variation that has not improved after a full month of proper chemistry | Possible application defect: inconsistent mix, uneven trowel application, premature drying during installation | Document and contact the installer. May be a warranty issue. |
For established stain removal techniques, the how to remove pool stains guide covers treatment methods for every stain type.
The Fill Water Problem Most Homeowners Miss
The water you use to fill your pool after resurfacing is one of the most common causes of new plaster discoloration, and most homeowners never think to test it before filling.
Municipal (town) water in many Sydney suburbs contains trace levels of iron, copper, and manganese. These metals are harmless in drinking water but react with the highly alkaline surface of new plaster (pH 12+ during initial curing) and deposit as coloured stains on the surface. The staining can appear within hours of filling.
Bore water and tank water often contain significantly higher metal concentrations than municipal water and are the most common source of severe iron and manganese staining on new plaster.
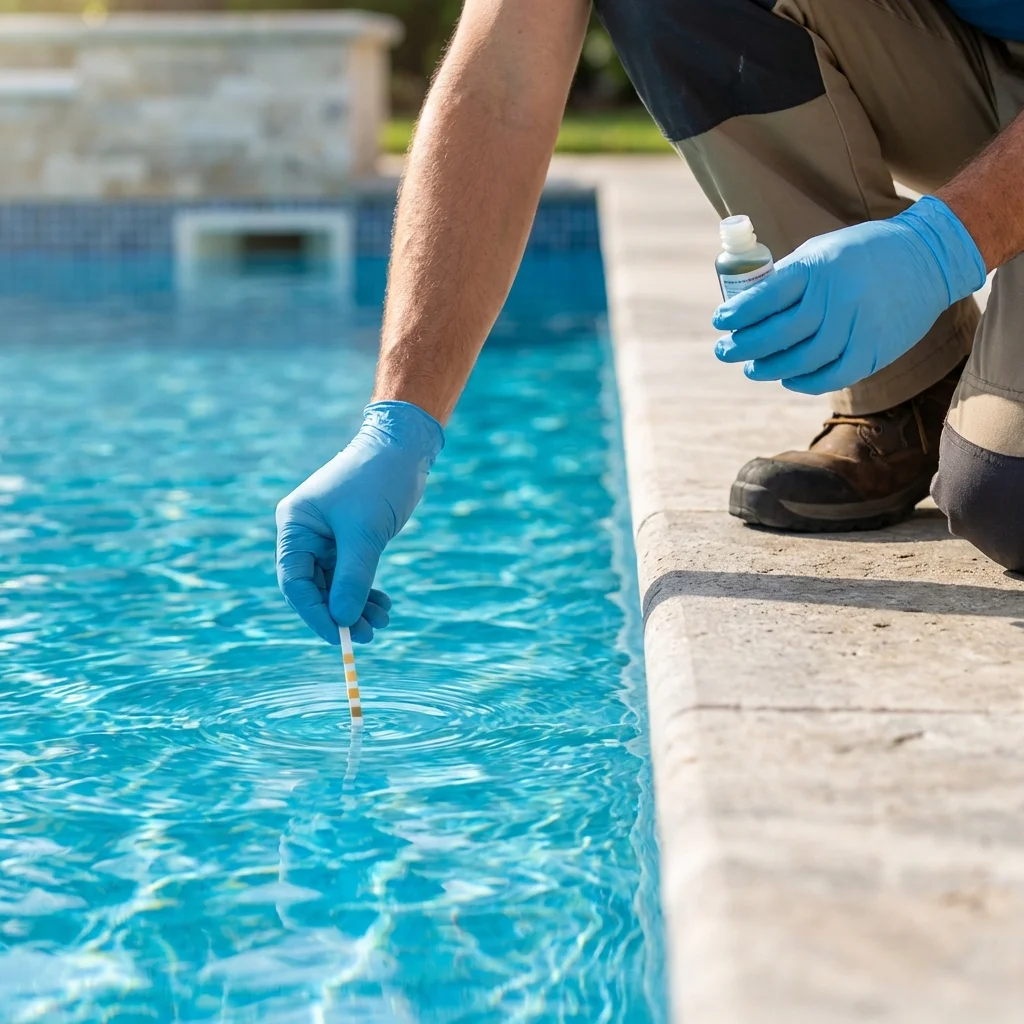
What to do: Test your fill water for metals (iron, copper, manganese) before filling the pool. If metals are present, use a sequestering agent (metal chelator) added to the pool as it fills. The sequestering agent binds to the metal ions and holds them in solution, preventing them from depositing on the plaster surface. This is a standard part of the startup chemistry program that Advance Pool Painting includes with every resurfacing project.
If filling has already occurred and metal staining has appeared, a sequestering agent can still be added to prevent further staining, and the existing stains can often be treated with ascorbic acid (vitamin C) for iron or a specific chelation treatment for copper and manganese. The sooner treatment begins, the more effective it is. Once metal stains have been on the surface for weeks, they bond chemically to the plaster and become much harder to remove.
Startup Chemistry: The 28 Days That Determine Your Surface’s Future
The first 28 days after filling a newly plastered or resurfaced pool are the most critical period for the surface’s long-term appearance and performance. The startup chemistry process controls the water balance to protect the curing plaster from damage.
Why startup chemistry is different from normal pool chemistry. New plaster is highly alkaline (the cement in the plaster has a pH above 12). This alkalinity leaches into the pool water aggressively during the first few weeks, driving the water’s pH and total alkalinity up rapidly. If left unchecked, the high pH and alkalinity cause calcium to precipitate out of solution and deposit on the plaster surface as white scale, which embeds in the curing surface and becomes part of the finish.
The correct startup process:
Test and balance the water chemistry within the first six hours of filling. Maintain pH between 7.2 and 7.6 by adding acid as needed (the pH will rise repeatedly during the first weeks as the plaster leaches alkalinity). Keep total alkalinity between 80 and 120 ppm. Keep calcium hardness between 200 and 300 ppm. Add sequestering agent to prevent metal staining. Start sanitiser at the lower end of the recommended range and increase gradually.
Brush the entire surface daily for the first 14 days. Brushing removes plaster dust that settles on the surface, prevents calcium deposits from bonding, evens out the hydration process, and helps the surface cure uniformly. Use a nylon-bristle brush (never stainless steel, which scratches new plaster). Brush the walls, floor, steps, and ledges systematically.
Test water chemistry daily for the first week, then every two to three days for the remainder of the first month. The plaster is actively leaching alkalinity into the water, which means the chemistry shifts rapidly and needs constant adjustment. By week three to four, the leaching slows and the water stabilises.
The complete aftercare program is covered in the pool resurfacing maintenance guide.
Specific Fixes for Each Discoloration Type
Once you have identified the type of discoloration, the fix depends on the cause.
Iron staining (brown, red, rust). Add a sequestering agent to bind the iron in solution. For existing stains, apply ascorbic acid (vitamin C) directly to the stain using a sock or mesh bag held against the surface. If the stain lightens immediately, it is confirmed as iron. Follow up with a full dose of sequestering agent to prevent the released iron from redepositing elsewhere. Maintain the sequestrant for several weeks.
Copper staining (blue-green, teal). Identify and eliminate the copper source: stop using copper-based algaecides, check for corrosion in copper heat exchangers, and test for copper in the fill water. Treat existing stains with a copper-specific chelation treatment. Balance the water chemistry to prevent further copper precipitation.
Calcium scaling (white deposits). Lower the pH to 7.2 and the calcium hardness to below 300 ppm. For light scaling, an acid wash of the affected area may remove the deposits. For heavier scaling that has bonded to the curing plaster, professional treatment may be needed. Prevention is significantly easier than removal, which is why startup chemistry management is so critical.
Etching (rough, dissolved surface). Etching is irreversible surface damage, not a stain. It occurs when the water is too acidic (pH below 7.0) and dissolves the plaster surface. Prevention is the only approach: maintain pH above 7.2 at all times during the curing period. If etching has occurred, the surface cannot be restored to its original smoothness without resurfacing the affected area.
Algae (green film). Shock the pool with chlorine to kill the algae, brush the surface thoroughly to remove the dead algae, and maintain sanitiser at effective levels going forward. New plaster is particularly vulnerable to algae because the surface is porous during curing and the startup period may have delayed full sanitiser application. Once the algae is removed and sanitiser is maintained, it should not return. For surface-specific protection options, the pool surface options guide covers which finishes resist algae best.
For any discoloration you cannot identify or resolve through these steps, a professional pool inspection determines the cause and recommends the correct treatment.
When Discoloration Is a Defect (Not a Chemistry Issue)
Some new plaster discoloration is caused by problems during the application itself, not by the water or the startup process.
Inconsistent mixing. If the plaster or pebblecrete was mixed with varying water ratios across batches, the cured surface will show colour variation between batches that does not even out over time. This is an application defect.
Premature drying during application. If the plaster surface dried too quickly before the pool was filled (from hot weather, wind, or delayed filling), the surface develops a condition called “dehydration discoloration” that creates permanent dark patches or streaks. This is an application defect.
Incorrect trowelling technique. Over-trowelling (working the surface too much) brings excess calcium to the surface, creating white patches that do not match the surrounding finish. Under-trowelling leaves a rough, porous surface that stains and scales more readily. Both are application defects.
Late filling. Plaster that is left unfilled for too long after application (more than a few hours in hot conditions) dehydrates and develops surface cracking and discoloration that is permanent.
If your discoloration matches these descriptions and does not respond to chemistry adjustment or stain treatment, it may be a workmanship issue. Document the discoloration with dated photographs, maintain your water chemistry records (which prove you managed the startup correctly), and contact your pool resurfacing contractor to discuss warranty remediation.
At Advance Pool Painting, we manage the startup chemistry process on every resurfacing project to ensure the new surface cures correctly and any water-related discoloration is caught and treated before it becomes permanent. The pool resurfacing maintenance guide covers the full post-resurfacing care program.
Preventing Discoloration on a New Pool Surface
Prevention during the first 28 days is dramatically easier than treatment after the fact.
Test fill water for metals before filling. Add sequestering agent during filling if metals are detected. Balance water chemistry within six hours of completing the fill. Maintain pH between 7.2 and 7.6 by testing and adjusting daily for the first week. Brush the entire surface daily with a nylon brush for the first 14 days. Do not use copper-based algaecides on new plaster. Introduce sanitiser gradually, starting at the low end of the range. Do not heat the pool for the first month (warm water accelerates scaling). Avoid automatic cleaners for the first 28 days (wheels and suction can mark the curing surface). Keep detailed water chemistry logs for the entire startup period.
For the full aftercare program, read the pool resurfacing maintenance guide. For help choosing a surface type for your next resurfacing, the pool surface options guide compares every choice, and the pool resurfacing cost guide covers pricing.
New Pool Plaster Discoloration: Normal vs Problem
What is part of the curing process, what indicates a chemistry issue, and what needs professional attention.
Normal Curing Behaviour (Usually Resolves)
Mottling
Blotchy, cloud-like colour variation. Trowel pressure and hydration differences. Evens out over 28 days.
Trowel Marks
Lines following application direction. More visible in clear water with strong light. Fade as surface hydrates.
Colour Shift
Colour differs from dry sample. Water depth and curing naturally shift the tone. Final colour settles by day 28.
Plaster Dust
White chalky residue settling on surface. Normal calcium hydroxide release. Removed by daily brushing.
Problem Discoloration (Needs Action)
Iron Staining
Brown, red, or rust spots. Iron in fill water reacting with alkaline plaster. Treat with ascorbic acid and sequestrant.
ACT WITHIN DAYS
Copper Staining
Blue-green or teal patches. Copper from algaecides, plumbing, or heater. Remove source and chelate.
ACT WITHIN DAYS
Calcium Scaling
White crusty deposits. High pH, high calcium, high alkalinity. Lower pH and treat before scale bonds permanently.
ACT WITHIN WEEKS
Etching
Rough, dissolved, washed-out surface. Acidic water dissolving the plaster. Irreversible. Prevention is the only fix.
ACT IMMEDIATELY
Algae
Green film developing on surface. Insufficient sanitiser during startup. Shock, brush, and maintain chlorine levels.
ACT IMMEDIATELY
Manganese
Black or dark purple spots. Manganese in fill water. Less common than iron but visually dramatic. Chelation treatment needed.
ACT WITHIN DAYS
The Critical First 28 Days
First 6 Hours
Balance water chemistry immediately after fill completes. Add sequestrant. Start sanitiser low.
Days 1 to 7
Test and adjust chemistry daily. Brush entire surface daily. pH rises rapidly as plaster leaches alkalinity.
Days 8 to 14
Continue daily brushing. Test every 2 to 3 days. Chemistry starts to stabilise. No auto cleaners yet.
Days 15 to 28
Brushing can reduce to every few days. Chemistry stabilising. Surface approaching final cure and colour.
Prevention Checklist
Do
Test fill water for metals before filling
Add sequestrant during filling
Balance chemistry within 6 hours of fill
Brush entire surface daily for 14 days
Keep detailed water chemistry logs
Avoid
Filling without testing water for metals
Letting pH drift above 7.6 during curing
Using copper-based algaecides on new plaster
Heating the pool during the first month
Using auto cleaners before day 28
💡 The Key Takeaway
Not all discoloration on new pool plaster is a problem. Some is normal curing behaviour that resolves within 28 days. But metal staining, scaling, etching, and algae are real problems that worsen the longer they are left untreated. The first 28 days of water chemistry management determine how the surface will look and perform for years. Treat this period as the most important maintenance window of the surface's entire life.
advancepoolpainting.com | Advance Pool Painting | Sydney's Pool Renovation Specialists Since 1993
Get Started Today
Request your free, detailed quote now. We’ll inspect your pool, discuss tile options, explain the complete process, and provide transparent pricing with no hidden costs.
Call us or contact our team to schedule your consultation. We serve all Sydney areas including Western Sydney, The Hills, Northern Sydney, Eastern Sydney, and Southern Sydney.
Visit our gallery to see completed retiling projects and the transformations we’ve delivered for Sydney homeowners.
Additional Pool Renovation Resources
Explore more ways to enhance your swimming pool:
- Discover comprehensive swimming pool renovation options beyond retiling
- Learn about pool tiling services for new construction and extensions
- Explore pebblecrete resurfacing as an alternative interior finish
- Consider fibreglass pool resurfacing if you have a fibreglass pool
View all our services and areas we service across Sydney.
Contact Us for a Free Consultation
Servicing all areas including Western Sydney, Northern Sydney, Eastern Sydney, and Southern Sydney.
Want to learn more about pool maintenance and upgrades? Explore our complete range of services or read our latest pool care articles.
About Advance Pool Painting: As Sydney’s trusted pool renovations, Painting repair and maintenance service provider, we help homeowners maximize their pool investment through expert renovations, heating solutions, and comprehensive maintenance services across all Sydney regions.
Frequently Asked Questions
Q1. Is it normal for new pool plaster to look blotchy?
Q2. Why did my new pool plaster turn brown?
Q3. How long does new pool plaster take to fully cure?
Q4. Can aggressive water damage new pool plaster?
Q5. Should I acid wash a newly plastered pool if it is discoloured?
Get the Quick Visual Guide
Explore Our Other Swimming Pool Services Services
Posted on GoogleTrustindex verifies that the original source of the review is Google. Ray did a wonderful job with repainting our pool. We are thrilled with the result. I would not hesitate to recommend his services to anyone.Posted on GoogleTrustindex verifies that the original source of the review is Google. Ray did a great job at our pool. Easy to deal with, quality-focused and putting the customers first. Very impressed and will highly recommend Ray to anyone needing a quality pool painting service at an affordable price!Posted on GoogleTrustindex verifies that the original source of the review is Google. Just had our pool repainted by Ray who brought our old faded pool back to life. Ray was reliable, friendly and did a quality job at a good price, would highly recommend.Posted on GoogleTrustindex verifies that the original source of the review is Google. Ray from Advance Pool Painting was great to deal with and I would easily recommend him if you are needing your pool painted. We are happy with the results, the outcome is of high quality.Posted on GoogleTrustindex verifies that the original source of the review is Google. Ray is a professional and a quality tradesman. Prompt with his response. Excellent workmanship. Very tidy and cleans up on completion of the work done on our pool.Quality was spot on and the price was reasonable. Customer service very good.Highly recommended.Posted on GoogleTrustindex verifies that the original source of the review is Google. Advance pool Painting were recommended to us and they did not dissapoint, Ray is a total gentlemen and everything he promised he delivered. I highly recommend their services.Posted on GoogleTrustindex verifies that the original source of the review is Google. I am absolutely thrilled with the transformation of my home. Ray was a delight to deal with from beginning to end and it was a completely stress free experience. He and his colleague Amin worked consistently for almost two weeks painting my pool and surrounding brick pavers, and also the exterior timber of my house. My real estate agent stopped by for a courtesy visit and was amazed at the massive improvement. Ray went above and beyond with a few extra tricky jobs that he wasn’t obliged to complete, but he takes great pride in the finished job and leaving happy customers. Not only is his customer service and skill next level, his pricing was also very reasonable. I cannot possibly recommend Ray more highly.Posted on GoogleTrustindex verifies that the original source of the review is Google. Thanks to Ray and co for painting and copping the pool.Posted on GoogleTrustindex verifies that the original source of the review is Google. We recently had our pool refreshed with new waterline tiles and epoxy paint by Ray, and the entire experience was outstanding from start to finish. Ray was incredibly professional, friendly, and took the time to answer all our questions with extreme patience. He was always punctual, kept us informed throughout the process, and delivered top-notch results that exceeded our expectations. The quality of his workmanship is clear in the final outcome — our pool looks amazing — and his pricing was competitive, especially considering the high standard of work and his vast experience in the field. We highly recommend Ray to anyone looking for a reliable, skilled, and experienced pool renovator. You’ll be in great hands!