Quick Overview:
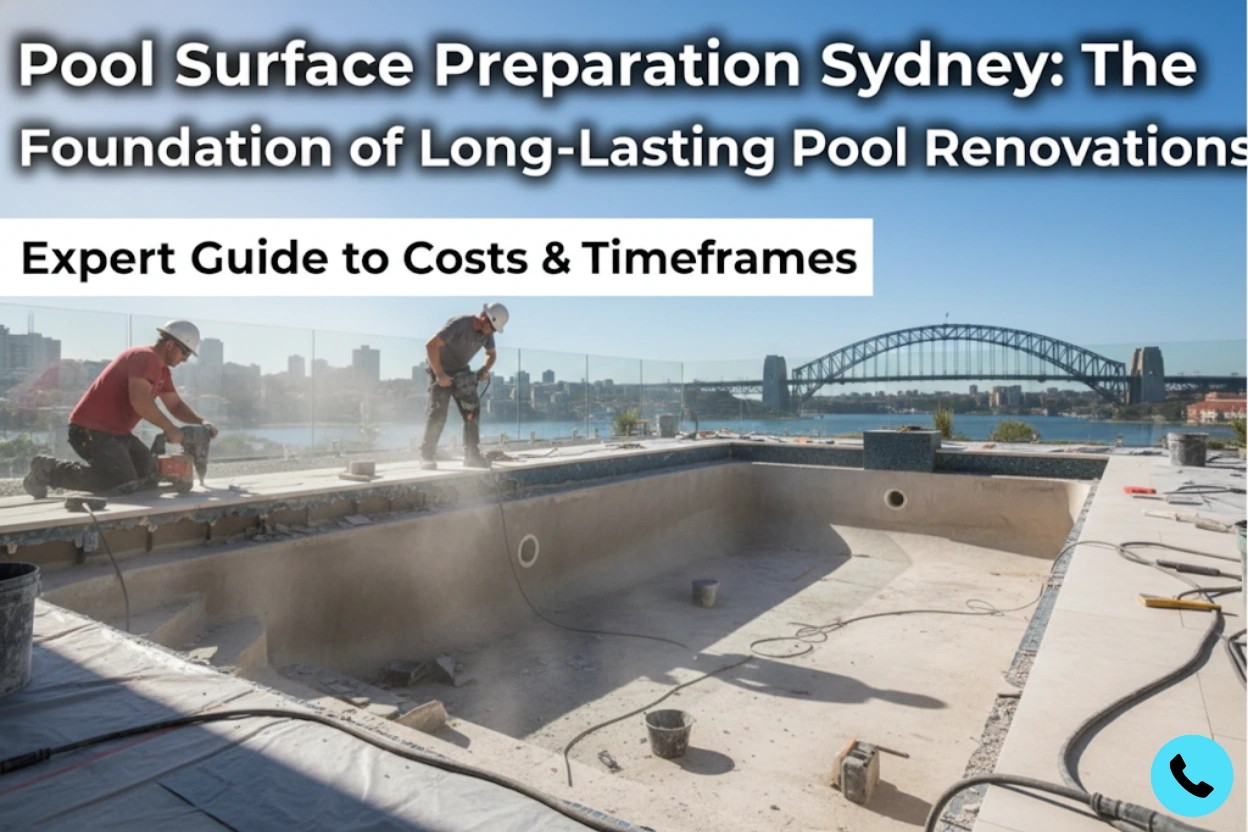
Pool surface preparation is the critical first step that determines whether your pool renovation will last 3 years or 10+ years. Proper surface prep involves acid washing, pressure cleaning, crack repair, grinding, and priming before any paint or coating is applied.
In Sydney, where pools face harsh UV exposure, salt air, and temperature fluctuations, cutting corners on preparation leads to premature paint failure, bubbling, and peeling within months. This guide covers the complete preparation process for concrete, fibreglass, and pebblecrete pools, explaining why 70% of pool paint failures stem from inadequate surface prep rather than poor paint quality.
You’ll discover the step-by-step preparation methods professionals use, common DIY mistakes that cost thousands in repairs, and how different pool types require specific prep techniques. Whether you’re planning to paint, resurface, or restore your pool, understanding proper surface preparation helps you avoid costly mistakes and ensures your investment delivers maximum value.
Understanding Pool Surface Preparation: Why It Matters
Pool surface preparation is the foundation that determines the success of every renovation project. Think of it like painting a house: applying premium paint over dirty, flaking walls guarantees failure regardless of paint quality.
What is pool surface preparation?
Surface preparation encompasses all the work done to create an ideal bonding surface before applying paint, epoxy, or other coatings. This includes cleaning, repairing, etching, and priming the pool shell.
Why Proper Preparation Is Non-Negotiable
Statistics from Sydney pool renovation companies reveal a troubling pattern: approximately 70% of premature pool paint failures result from inadequate surface preparation, not inferior paint products.
Here’s what happens when preparation is rushed:
- Paint begins peeling within 6-12 months instead of lasting 5-7 years
- Bubbling appears where moisture was trapped under new coating
- Uneven finish reveals every imperfection in the original surface
- Complete re-doing of the job at double the original cost
The financial impact:
Skipping proper prep to save $800-$1,500 upfront typically costs $4,000-$8,000 within two years when the entire job needs redoing. Professional preparation isn’t an expense; it’s insurance against expensive failures.
“We see it constantly. Homeowners call us to fix a paint job that’s failing after just one season. When we inspect, it’s always the same issue: the surface wasn’t properly prepared. The paint itself is fine, but it never had a chance to bond correctly.” – Senior Pool Renovation Specialist, Sydney
The Science Behind Surface Preparation
Understanding why preparation matters helps explain why professionals invest significant time in this stage.
How Coatings Bond to Pool Surfaces
Pool paints and coatings don’t simply sit on top of your pool surface. They create a molecular bond with the substrate underneath. This bond requires:
Clean surfaces: Contaminants (oils, algae, calcium deposits, old paint residue) create barriers preventing proper adhesion.
Proper pH levels: Pool surfaces must be neutralized to specific pH ranges for epoxy and other coatings to bond correctly.
Mechanical tooth: Smooth surfaces offer nothing for paint to grip. Etching creates microscopic valleys that provide mechanical adhesion.
Structural integrity: Loose material, cracks, or delaminating concrete must be addressed or the new coating will fail at these weak points.
Sydney-Specific Challenges
Sydney’s climate creates unique preparation challenges:
- Intense UV exposure: Breaks down old coatings faster, requiring more thorough removal
- Salt air corrosion: Eastern suburbs pools need extra attention to chloride contamination
- Temperature fluctuations: Can cause expansion/contraction issues if substrate isn’t properly prepared
- High chlorine levels: Many Sydney pools are over-chlorinated, requiring neutralization before coating
Step-by-Step Pool Surface Preparation Process
Professional preparation follows a systematic approach. Missing steps or rushing through them causes problems months later.
Step 1: Initial Assessment and Drainage
What happens:
Professionals inspect your pool while still filled to identify problem areas. They look for:
- Visible cracks or structural damage
- Areas of delamination or loose material
- Staining patterns indicating underlying issues
- Previous repair quality
Drainage considerations:
Pools must be completely drained for preparation. However, timing matters. In Sydney’s heat, never leave a fibreglass pool empty for more than 48 hours without weight in the deep end (ground pressure can cause “pop-up”).
Step 2: Surface Cleaning and Contaminant Removal
Initial cleaning methods:
- Pressure washing: Removes loose debris, algae, and surface contaminants (2,500-3,500 PSI for concrete, lower for fibreglass)
- Scrubbing: Manual removal of stubborn deposits in corners and steps
- Degreasing: Chemical treatment removes oils, sunscreen residue, and body oils
This stage removes everything that would prevent the next preparation steps from working effectively.
Step 3: Acid Washing or Chemical Etching
This is where proper preparation separates professionals from amateurs.
For concrete and pebblecrete pools:
Acid washing uses muriatic acid (hydrochloric acid) to:
- Remove the top microscopic layer of concrete
- Eliminate calcium deposits and staining
- Create a slightly roughened surface for better paint adhesion
- Neutralize alkalinity in the concrete
Application process:
- Apply diluted acid solution (ratio depends on surface condition)
- Allow 2-3 minutes of contact time
- Scrub with acid-resistant brushes
- Thoroughly rinse with fresh water
- Neutralize remaining acid with soda ash solution
- Final rinse until pH neutral
For fibreglass pools:
Acid is NOT used on fibreglass. Instead:
- TSP (trisodium phosphate) cleaning solutions
- Dewaxing agents to remove gelcoat oxidation
- Fine sanding (80-120 grit) for mechanical adhesion
- Acetone wipe-down to remove all residue
Step 4: Crack and Structural Repairs
Even minor imperfections become major problems once covered with new coating.
Common repairs include:
- Crack filling with epoxy or specialized pool repair compounds
- Grinding out larger cracks to create proper bonding surfaces
- Structural repairs for shell damage
- Replastering severely damaged areas
- Tile repair or replacement around waterline
Why timing matters:
Repairs must fully cure before proceeding. Epoxy repairs typically need 24-48 hours in Sydney’s climate. Rushing this stage traps moisture and solvents under the new coating.
Step 5: Surface Grinding and Smoothing
For concrete pools:
Diamond grinding removes:
- High spots and uneven areas
- Old paint that didn’t come off during acid washing
- Rough patches from previous repairs
- Surface scale and calcification
For fibreglass pools:
Sanding focuses on:
- Removing oxidized gelcoat
- Creating uniform surface texture
- Eliminating glossy areas where paint won’t bond
- Smoothing any previous repair spots
Step 6: Final Cleaning and Inspection
After grinding or sanding:
- Vacuum all dust and debris
- Pressure wash again to remove grinding residue
- Allow complete drying (critical – moisture causes adhesion failure)
- Inspect under bright light for missed areas
Moisture testing:
Professional contractors test moisture levels, especially in concrete pools. Acceptable moisture content is typically below 4% before coating application.
Step 7: Primer Application
This step is often skipped by DIY enthusiasts and budget contractors, yet it’s crucial for longevity.
Why primer matters:
- Seals porous concrete, preventing outgassing (bubbles in topcoat)
- Provides uniform surface for consistent topcoat absorption
- Enhances chemical bonding between substrate and finish coat
- Extends overall system lifespan by 40-60%
Primer types by pool surface:
| Pool Type | Recommended Primer | Purpose |
|---|---|---|
| Concrete | Epoxy-based pool primer | Seals porosity, bonds to alkaline surfaces |
| Fibreglass | Epoxy or bonding primer | Adheres to smooth gelcoat surfaces |
| Pebblecrete | High-build epoxy primer | Fills texture variations |
| Previously painted | Compatible primer system | Ensures new paint bonds to old |
Different Preparation Methods for Different Pool Types
Not all pools receive identical preparation. Surface material dictates specific approaches.
Concrete Pool Surface Preparation
Concrete pools are the most forgiving but require the most intensive preparation.
Unique requirements:
- Aggressive acid washing to neutralize alkalinity
- Longer drying time (concrete holds moisture)
- More extensive crack repair (concrete naturally develops hairline cracks)
- Multiple primer coats often needed
Timeline: 3-5 days for proper concrete pool preparation
Fibreglass Pool Surface Preparation
Fibreglass requires gentler but more precise preparation.
Critical steps:
- Never use acid (damages gelcoat)
- Thorough sanding is essential (paint won’t stick to glossy gelcoat)
- Dewaxing removes manufacturer’s protective coating
- Surface must be completely dry (fibreglass doesn’t breathe like concrete)
Explore more about fibreglass pool resurfacing requirements.
Timeline: 2-3 days for fibreglass pool preparation
Pebblecrete Pool Surface Preparation
Pebblecrete surfaces present unique challenges due to their texture.
Special considerations:
- Acid washing must reach between pebbles
- High-pressure washing essential for deep cleaning
- Exposed aggregate areas may need patching
- High-build primers necessary to create smooth surface
Timeline: 4-6 days for pebblecrete preparation
Common Surface Preparation Mistakes That Cost Thousands
Learning from others’ errors saves money and frustration.
Mistake #1: Insufficient Drying Time
The problem: Applying coating over damp surfaces traps moisture, causing bubbling and delamination.
Reality: Concrete pools in Sydney typically need 3-5 sunny days to dry completely after washing. Humid weather requires even longer.
The fix: Professional moisture meters ensure surfaces are genuinely dry, not just visually dry.
Mistake #2: Inadequate Acid Washing
The problem: Light acid washing leaves alkalinity in concrete that attacks epoxy paint from underneath.
Signs: Paint lifts off in sheets, often starting at the deep end where concrete is thickest.
The fix: Proper acid washing neutralizes pH completely. Test strips verify correct pH levels before proceeding.
Mistake #3: Skipping Primer
The problem: Applying paint directly to prepared surfaces without primer.
Consequence: Paint soaks unevenly into porous areas, creates thin spots, and fails within 1-2 years instead of 5-7 years.
Cost: Premature repainting costs $4,000-$8,000, far exceeding the $600-$1,200 saved by skipping primer.
Mistake #4: Ignoring Small Cracks
The problem: Painting over hairline cracks without repair.
What happens: Cracks continue expanding under new coating. Within months, paint cracks along the same lines, allowing water penetration that accelerates deterioration.
The fix: All cracks, regardless of size, must be properly filled and sealed before coating.
Mistake #5: Wrong Preparation for Pool Type
The problem: Using concrete pool preparation methods on fibreglass (or vice versa).
Example: Acid washing fibreglass damages the gelcoat, creating a poor bonding surface that guarantees paint failure.
The fix: Match preparation method precisely to pool construction material.
DIY vs Professional Surface Preparation
Many pool owners consider DIY preparation to save money. Understanding what’s involved helps make informed decisions.
What DIY Preparation Actually Requires
Equipment needed:
- Professional pressure washer (2,500+ PSI)
- Acid-resistant protective gear (respirator, goggles, gloves, boots)
- Diamond grinding equipment (for concrete)
- Orbital sanders (for fibreglass)
- pH testing equipment
- Moisture meter
- Safety equipment
Estimated equipment cost: $1,200-$2,500 to purchase or $300-$600 to rent for a week
Time investment: 40-60 hours for average residential pool
Chemical knowledge required:
- Proper acid dilution ratios
- Neutralization procedures
- Safety protocols for handling hazardous materials
- Understanding of surface chemistry
When DIY Makes Sense
Suitable scenarios:
- Small above-ground pools
- Simple concrete pool in good condition
- You have relevant experience
- Project timeline is flexible
- You already own necessary equipment
When Professional Preparation Is Essential
Professional preparation is strongly recommended for:
- Fibreglass pools (easy to damage with improper technique)
- Pools with structural issues or extensive cracking
- Pebblecrete surfaces (complex preparation requirements)
- When applying premium coatings (epoxy, high-performance paints)
- Projects with tight timelines
- Any pool where painting quality is critical
Cost comparison:
Professional preparation: $1,500-$3,500 (typically 25-35% of total renovation cost)
DIY gone wrong: $4,000-$8,000 to fix failed coating plus original DIY costs
How Weather Affects Pool Surface Preparation in Sydney
Sydney’s climate significantly impacts preparation timing and methods.
Ideal Conditions for Pool Preparation
Temperature: 15-28°C (optimal curing conditions)
Humidity: Below 60% (faster drying, better paint adhesion)
Season: Spring and autumn offer ideal conditions
Rain: No precipitation for 48 hours before or after application
Seasonal Considerations
Summer preparation:
- Pros: Fast drying time, warm weather accelerates curing
- Cons: Surfaces can get too hot (paint dries too quickly), increased evaporation requires more water for rinsing
- Best practice: Work early morning or late afternoon
Winter preparation:
- Pros: Lower UV exposure, consistent temperatures
- Cons: Longer drying times, potential frost damage to wet repairs, shorter working days
- Best practice: Allow extra drying time, monitor weather closely
Spring/Autumn:
- Ideal conditions: Moderate temperatures, lower humidity, stable weather patterns
- Best time: Late September to November, March to May
The Connection Between Preparation and Paint Lifespan
Proper preparation directly correlates to how long your pool finish lasts.
Expected Lifespan by Preparation Quality
| Preparation Quality | Expected Paint Life | Re-paint Frequency | 10-Year Cost |
|---|---|---|---|
| Professional full prep | 7-10 years | Once | $6,000-$8,000 |
| Adequate prep | 4-6 years | Twice | $10,000-$14,000 |
| Minimal prep | 1-3 years | 3-4 times | $18,000-$28,000 |
The numbers clearly show: investing in proper preparation costs significantly less over time than repeatedly patching poor preparation.
Learn more about pool paint lifespan factors.
Signs Your Pool Wasn’t Properly Prepared
Watch for these red flags after recent painting:
- Bubbling or blistering within first 6 months
- Paint peeling in large sheets
- Uneven color or texture
- Rapid fading despite quality paint
- Cracking along previous repair lines
These indicate preparation problems, not paint defects. Understanding this helps when choosing pool painting contractors.
Advanced Preparation Techniques
Professional pool renovation companies use specialized techniques for challenging situations.
Pool Blasting for Severe Cases
When traditional preparation methods aren’t sufficient, pool blasting provides aggressive surface preparation.
What is pool blasting?
Using compressed air to propel abrasive media (glass beads, sand, or minerals) at pool surfaces, removing everything down to bare substrate.
When it’s necessary:
- Multiple layers of old paint
- Severe calcium scaling
- Failed previous coating jobs
- Extremely rough or damaged surfaces
Benefits:
- Most thorough preparation method available
- Creates ideal surface profile for coating adhesion
- Removes contaminants impossible to clean otherwise
- Can restore heavily damaged pools to like-new condition
Moisture Vapor Testing
For concrete pools in high water table areas (common in Western Sydney), moisture testing prevents catastrophic coating failure.
The process:
- Tape plastic sheet to pool surface
- Wait 24 hours
- Check for condensation underneath
- If moisture present, delay coating until resolved
Cost Breakdown: What You’re Actually Paying For
Understanding preparation costs helps evaluate contractor quotes.
Typical Sydney Pool Surface Preparation Costs
Small pool (6m x 3m):
- Basic preparation: $1,200-$1,800
- Standard preparation: $1,800-$2,500
- Premium preparation: $2,500-$3,500
Medium pool (8m x 4m):
- Basic preparation: $1,800-$2,500
- Standard preparation: $2,500-$3,500
- Premium preparation: $3,500-$5,000
Large pool (10m x 5m):
- Basic preparation: $2,500-$3,500
- Standard preparation: $3,500-$5,000
- Premium preparation: $5,000-$7,000
What’s included in each tier:
Basic: Pressure washing, basic acid wash, minor repairs, one coat primer
Standard: Thorough cleaning, proper acid washing, crack repairs, grinding as needed, quality primer system
Premium: Complete surface preparation, extensive repairs, blasting if needed, moisture testing, premium primer system, warranty
Explore comprehensive pool resurfacing costs to budget your complete project.
Preparing for Different Pool Finishes
The intended final finish determines specific preparation requirements.
Preparation for Epoxy Paint
Epoxy coatings demand the most rigorous preparation:
- Complete removal of all previous coatings
- Neutralized, properly etched surface
- Moisture content below 4%
- Premium bonding primer essential
- Preparation accounts for 40% of total project cost
Preparation for Chlorinated Rubber Paint
More forgiving than epoxy but still requires:
- Clean, sound surface
- Previous paint can remain if well-bonded
- Acid washing to improve adhesion
- Standard pool primer
Preparation for Pool Rendering
Before applying new render or replaster:
- Remove all loose material down to sound substrate
- Repair structural issues
- Create mechanical key for render adhesion
- Ensure surface is rough enough for render to grab
Maintaining Your Prepared Surface Before Coating
After preparation is complete but before coating application, protect your investment.
Protection During Waiting Period
Cover the pool: Tarps prevent debris, leaves, and rain contamination
Limit access: Keep people and pets away from prepared surfaces
Monitor weather: Rain can necessitate re-washing and drying
Schedule coordination: Plan coating application immediately after preparation completes
What Requires Re-Preparation
If more than 7 days pass between preparation and coating:
- Light re-wash may be needed
- Surface inspection for contamination
- Possible additional acid wash
- Re-verification of pH levels
Questions to Ask Your Pool Preparation Contractor
Before hiring a pool renovation company for surface preparation, ask:
- What specific preparation steps do you perform? (Should list all 7 steps mentioned earlier)
- How do you test for proper moisture levels? (Should mention moisture meters, not just visual inspection)
- What’s included in your preparation quote? (Detailed breakdown prevents surprise costs)
- How long between preparation and coating? (Should be 24-48 hours maximum)
- What happens if it rains during preparation? (Should have contingency plan)
- Do you provide preparation warranty? (Indicates confidence in their work)
- Can I see examples of your preparation work? (Before photos showing surface condition)
- What primer system do you use and why? (Should match pool type and finish coat)
Professional contractors welcome these questions and provide detailed answers.
7-Step Pool Surface Preparation Process
The Professional Method That Ensures 7-10 Years of Paint Life
Initial Assessment & Drainage
Day 1Professional inspection identifies problem areas while pool is filled. Strategic drainage prevents structural issues.
- Identify cracks, delamination, and staining patterns
- Complete drainage with proper timing considerations
- Document current pool condition
Surface Cleaning & Contaminant Removal
Day 1-2High-pressure washing removes loose debris, algae, and surface contaminants that prevent proper adhesion.
- Pressure washing at 2,500-3,500 PSI
- Manual scrubbing of stubborn deposits
- Chemical degreasing for oil removal
Acid Washing or Chemical Etching
Day 2Removes microscopic concrete layer, eliminates staining, neutralizes alkalinity, and creates ideal bonding surface.
- Muriatic acid application for concrete pools
- TSP cleaning for fibreglass pools (never acid)
- Multiple rinses until pH neutral
- Neutralization with soda ash solution
Crack & Structural Repairs
Day 2-3All cracks and imperfections must be repaired before coating. Even minor issues cause major problems later.
- Epoxy crack filling for hairline cracks
- Grinding larger cracks for proper bonding
- Structural shell repairs if needed
- 24-48 hour curing time before proceeding
Surface Grinding & Smoothing
Day 3-4Diamond grinding removes high spots, old paint, and creates uniform texture for perfect coating adhesion.
- Diamond grinding for concrete pools
- 80-120 grit sanding for fibreglass pools
- Removal of all loose or peeling material
- Creation of mechanical tooth for paint grip
Final Cleaning & Inspection
Day 4-5Thorough cleaning removes all dust and debris. Complete drying is critical for coating success.
- Vacuum all grinding dust and debris
- Final pressure wash to remove residue
- 3-5 days drying in Sydney climate
- Moisture testing (below 4% for concrete)
- Bright light inspection for missed areas
Primer Application
Day 5-6Professional primer seals porous surfaces, prevents outgassing, and extends paint life by 40-60%.
- Epoxy-based primer for concrete pools
- Bonding primer for fibreglass pools
- High-build primer for pebblecrete
- 24-48 hour curing before topcoat
Why Proper Preparation Matters
Of paint failures are from poor preparation, not bad paint
Days required for proper preparation in Sydney climate
Longer paint life when primer is used versus skipped
Long-Term Cost Comparison
| Preparation Quality | Paint Lifespan | 10-Year Cost |
|---|---|---|
| Professional Full Prep | 7-10 years | $6,000-$8,000 |
| Adequate Prep | 4-6 years | $10,000-$14,000 |
| Minimal Prep | 1-3 years | $18,000-$28,000 |
Critical Success Factors
Proper Drying Time
Concrete pools need 3-5 sunny days to dry completely. Moisture trapped under paint causes bubbling and peeling within months.
pH Neutralization
After acid washing, surfaces must be completely neutralized. Remaining acid or alkalinity attacks paint from underneath.
Complete Crack Repair
All cracks must be properly filled and cured. Painting over cracks guarantees they'll reappear and expand under new coating.
Professional Primer
Primer prevents outgassing, ensures even absorption, and extends paint life by 40-60%. Never skip this crucial step.
Common Preparation Mistakes
Skipping primer to save $600-$1,200 typically costs $4,000-$8,000 in premature repainting. Painting over damp surfaces causes bubbling within 6 months. Using concrete methods on fibreglass (or vice versa) guarantees coating failure. Not allowing repairs to cure properly creates weak points that fail first.
Professional Preparation Checklist
- All 7 preparation steps completed in proper order
- Moisture testing confirms surfaces are dry (below 4%)
- pH testing shows complete neutralization
- All repairs fully cured before coating application
- Quality primer system matched to pool type
- Weather conditions suitable for each preparation stage
- Final inspection under bright light before primer
Ready for Professional Pool Surface Preparation?
Proper preparation is the foundation of a long-lasting pool renovation. Don't let your investment fail due to rushed or inadequate surface prep.
Get Expert Preparation QuoteWhat Our Customers Say
5.0 | 14 Google reviews
5 days ago
"Ray is a professional and a quality tradesman. Prompt with his response. Excellent workmanship. Very tidy and cleans up on completion."
1 week ago
"Advance Pool Painting were recommended to us and they did not disappoint. Ray is a total gentlemen and everything he promised he delivered. I highly recommend this business."
1 month ago
"I am absolutely thrilled with the transformation of my home. Ray was a delight to deal with from beginning to end and it was a completely stress free experience."
Ready to Prepare Your Pool Surface Properly?
Pool surface preparation isn’t glamorous, but it’s the difference between a renovation that lasts 3 years versus one that lasts 10 years. Every hour spent on proper preparation saves thousands in premature repairs.
Whether you’re planning to paint, resurface, or completely renovate your pool, insist on comprehensive surface preparation. Ask detailed questions, verify contractor processes, and never compromise on this critical foundation stage.
Professional surface preparation services ensure:
- Proper techniques for your specific pool type
- Correct drying times regardless of weather
- Quality materials and equipment
- Warranty protection on preparation work
- Coordination with coating application for optimal results
Don’t let your pool renovation fail because of inadequate preparation. Invest in this crucial first step, and your pool will reward you with years of beautiful, durable finish.
Looking for more information on related pool services? Explore our comprehensive guides on pool renovation services, learn about different service areas throughout Sydney, or browse our gallery to see the results of properly prepared and finished pools.
Ready to discuss your pool’s surface preparation needs? Contact experienced pool renovation specialists who understand Sydney’s unique climate challenges and deliver preparation work that lasts.
Your pool deserves the foundation for success. Proper surface preparation is where that foundation begins.
Get Started Today
Request your free, detailed quote now. We’ll inspect your pool, discuss tile options, explain the complete process, and provide transparent pricing with no hidden costs.
Call us or contact our team to schedule your consultation. We serve all Sydney areas including Western Sydney, The Hills, Northern Sydney, Eastern Sydney, and Southern Sydney.
Visit our gallery to see completed retiling projects and the transformations we’ve delivered for Sydney homeowners.
Additional Pool Renovation Resources
Explore more ways to enhance your swimming pool:
- Discover comprehensive swimming pool renovation options beyond retiling
- Learn about pool tiling services for new construction and extensions
- Explore pebblecrete resurfacing as an alternative interior finish
- Consider fibreglass pool resurfacing if you have a fibreglass pool
View all our services and areas we service across Sydney.
Contact Us for a Free Consultation
Servicing all areas including Western Sydney, Northern Sydney, Eastern Sydney, and Southern Sydney.
Want to learn more about pool maintenance and upgrades? Explore our complete range of services or read our latest pool care articles.
About Advance Pool Painting: As Sydney’s trusted pool renovations, Painting repair and maintenance service provider, we help homeowners maximize their pool investment through expert renovations, heating solutions, and comprehensive maintenance services across all Sydney regions.
Frequently Asked Questions
Q1. How long does proper pool surface preparation take in Sydney?
Q2. Can I paint my pool immediately after acid washing?
Q3. Is surface preparation different for saltwater pools versus chlorine pools?
Q4. What happens if I skip primer after surface preparation?
Q5. How do I know if my pool was properly prepared before painting?
Get the Quick Visual Guide
Explore Our Other Swimming Pool Services Services


Posted onTrustindex verifies that the original source of the review is Google. Ray did a wonderful job with repainting our pool. We are thrilled with the result. I would not hesitate to recommend his services to anyone.Posted onTrustindex verifies that the original source of the review is Google. Ray did a great job at our pool. Easy to deal with, quality-focused and putting the customers first. Very impressed and will highly recommend Ray to anyone needing a quality pool painting service at an affordable price!Posted onTrustindex verifies that the original source of the review is Google. Just had our pool repainted by Ray who brought our old faded pool back to life. Ray was reliable, friendly and did a quality job at a good price, would highly recommend.Posted onTrustindex verifies that the original source of the review is Google. Ray from Advance Pool Painting was great to deal with and I would easily recommend him if you are needing your pool painted. We are happy with the results, the outcome is of high quality.Posted onTrustindex verifies that the original source of the review is Google. Ray is a professional and a quality tradesman. Prompt with his response. Excellent workmanship. Very tidy and cleans up on completion of the work done on our pool.Quality was spot on and the price was reasonable. Customer service very good.Highly recommended.Posted onTrustindex verifies that the original source of the review is Google. Advance pool Painting were recommended to us and they did not dissapoint, Ray is a total gentlemen and everything he promised he delivered. I highly recommend their services.Posted onTrustindex verifies that the original source of the review is Google. I am absolutely thrilled with the transformation of my home. Ray was a delight to deal with from beginning to end and it was a completely stress free experience. He and his colleague Amin worked consistently for almost two weeks painting my pool and surrounding brick pavers, and also the exterior timber of my house. My real estate agent stopped by for a courtesy visit and was amazed at the massive improvement. Ray went above and beyond with a few extra tricky jobs that he wasn’t obliged to complete, but he takes great pride in the finished job and leaving happy customers. Not only is his customer service and skill next level, his pricing was also very reasonable. I cannot possibly recommend Ray more highly.Posted onTrustindex verifies that the original source of the review is Google. Thanks to Ray and co for painting and copping the pool.Posted onTrustindex verifies that the original source of the review is Google. We recently had our pool refreshed with new waterline tiles and epoxy paint by Ray, and the entire experience was outstanding from start to finish. Ray was incredibly professional, friendly, and took the time to answer all our questions with extreme patience. He was always punctual, kept us informed throughout the process, and delivered top-notch results that exceeded our expectations. The quality of his workmanship is clear in the final outcome — our pool looks amazing — and his pricing was competitive, especially considering the high standard of work and his vast experience in the field. We highly recommend Ray to anyone looking for a reliable, skilled, and experienced pool renovator. You’ll be in great hands!